Iot Weather Station Circuit Diagram
BlogIot Weather Station Circuit Diagram Learn how to build an IoT weather station with an ESP32. This step-by-step guide covers all the necessary components, setup, coding, and deployment for monitoring weather conditions. IoT Weather Station The Internet of Things (IoT) has dramatically transformed how we interact with and monitor our environment. Whether it's smart homes or wearable devices, IoT technology The main aim of this project is to create an online weather system dashboard based on Ubidots, which enables a user to check real-time weather parameters of a place anytime and anywhere with just a few buttons click. So, let's get started! Here's what you'll need. Materials Required. The following hardware and software will be required in this
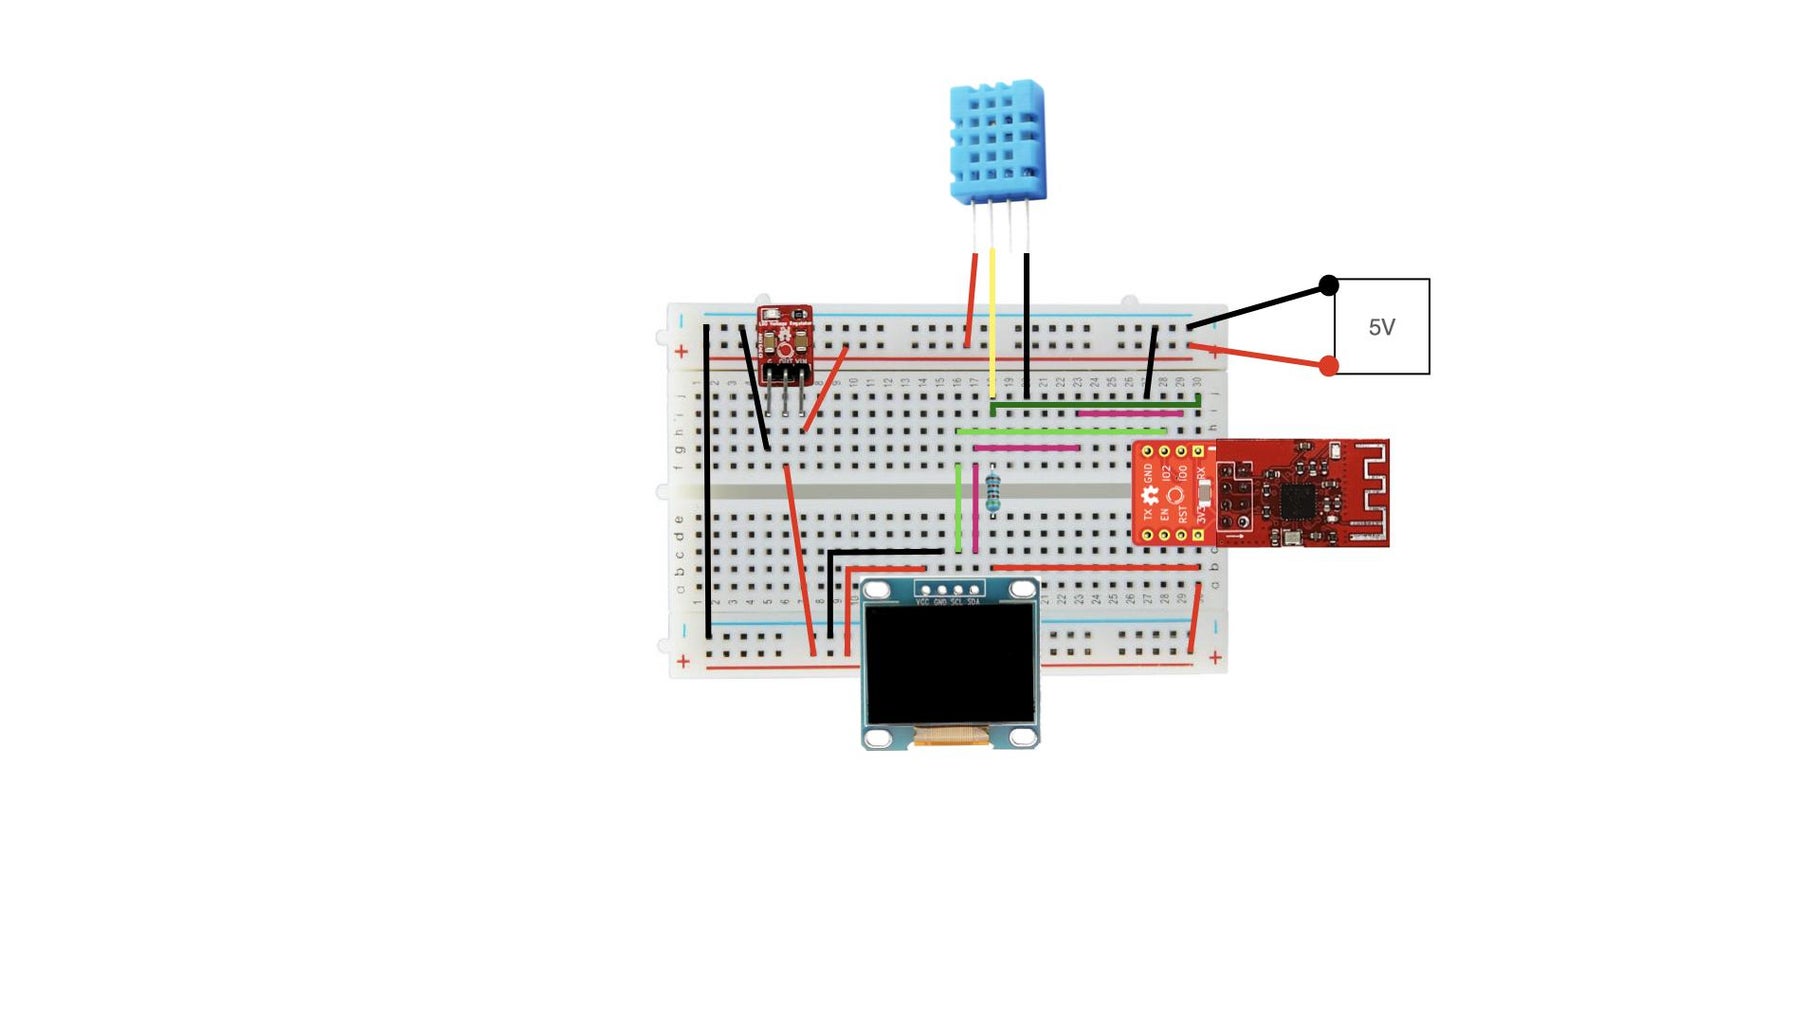
Learn how to build a personal weather station using Raspberry Pi 5 to monitor temperature, humidity, and atmospheric pressure in real-time. This guide covers essential components, sensor setup, coding, and data visualization. Perfect for DIY enthusiasts, this project offers valuable insights into weather patterns while enhancing your skills in electronics and programming. Personal Weather Station IOT Live Weather Station Monitoring Using NodemCU ESP8266. This post is all about IoT based Live Weather Station Monitoring Using NodemCU ESP8266.We will interface DHT11 Humidity & Temperature Sensor, BMP180 Barometric Pressure Sensor, and FC37 Rain Sensor with NodeMCU ESP8266-12E Wifi Module.We will measure humidity, temperature, Barometric pressure, and rainfall and upload the data to a web

IOT BASED SMART WEATHER STATION : 7 Steps Circuit Diagram
4. Run the program and check real-time data online! Step 4: Create a Weather Dashboard. For easy access, display your weather data on: Mobile Apps - Use Blynk or IoT dashboards for live updates. Webpage - Create a simple HTML page fetching data from the cloud. Home Assistant Integration - Automate alerts and smart home actions. IntroductionNow you can check the weather of any place in the world in real-time and plan your days and trips without depending on the weather agencies! In this project, we're going to make a weather station based on the Internet of Things (IoT) using evive, ESP8266 WiFi module, and PictoBlox - a Scratch 3.0-based graphical programming software. With the weather station, you will be able

It is a system that involves in acquiring weather and environment data using advanced electronic sensors and sending them to a web server vi Sep 3, 2022 40207 views

IoT Live Weather Station Monitor Using NodeMCU ESP8266 Circuit Diagram
The parameters are displayed on the Blynk IoT platform both on the Web Dashboard as well the Phone App in the form of live values and charts. This can be a good project to get started with IoT. Hardware and connection part is easy. Code and setup part is just a bit lengthy so read the instructions carefully till the end to make sure everything

Communicate between weather station and server How can I reduce maintenance to (almost) zero? Manage hanging of software Manage loss of connectivity Manage loss of energy supply. 2 .Objective/Aim : The goal of this project is to make a temperature/humidity monitor that wirelessly logs the temperature and humidity to a remote server. We will use In this article, we'll walk through how to create a simple weather station using an ESP8266 Wi-Fi module and a 0.96″ OLED display.By fetching weather data from the OpenWeatherMap API, we will display live weather information, including temperature, conditions, and more, right on your OLED display.This project is perfect for beginners in electronics and IoT development.